
Both ladies and girls can look stylish and classic with the basket hairstyle. This option is highly adaptable, as it can be dressed up or down for special occasions, making it a favorite among people who enjoy complex and imaginative hairstyles. A chic and distinctive option, the basket weave is perfect for any occasion, be it a wedding, a family get-together, or even just school.
This hairstyle involves braiding hair to give it a gorgeous, braided appearance by weaving it in a basket-like manner. Although the procedure might appear difficult at first, it is simple to duplicate at home with a little practice. Moreover, the outcome is consistently striking, rendering the exertion worthwhile.
We’ll walk you through the process of creating the ideal basket hairstyle in this guide, complete with easy-to-follow directions and step-by-step images. Whether you’re a novice or a seasoned braider, trying this look will be enjoyable and fulfilling.
- Basket hairstyle for girls step by step – video
- Basket hairstyle for long hair – a classic version
- Basket with a braid
- Simplified version
- Basket hairstyle made of rubber bands
- Basket hairstyle for short hair
- French basket hairstyle
- Video on the topic
- Beautiful #Hair for School / Pautinka Basket / #Hairstyles for Long hair
- Beautiful #Hair for the School / Basket / #Hairstyles for Long hair
- Beautiful #hairstyles for girls / #Hairstyle for medium hair
- Beautiful #hairstyle / basket Snail
Basket hairstyle for girls step by step – video
A weaving-inspired hairstyle known as a basket is appropriate for ladies and girls of all ages and on various occasions. It can be made by a mother of small children as well as a businesswoman.
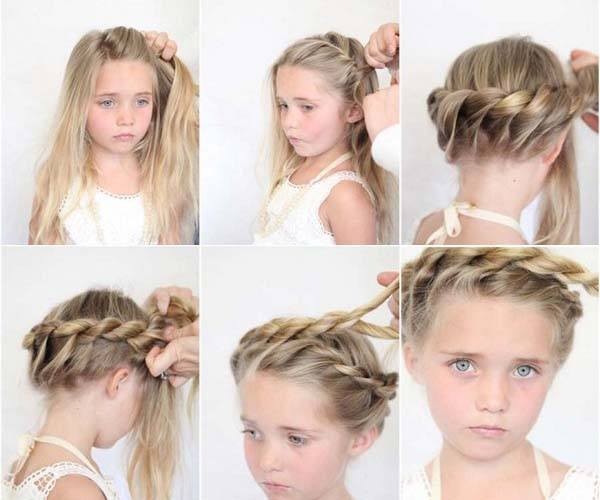
The benefit of this haircut is that it creates a very adorable and feminine appearance without allowing the hair to get in the way. In addition, creating a basket hairstyle at home is a simple task that can be done on your own without professional assistance.

Girls’ basket hairstyles for children are woven tightly to prevent the style from unraveling during the day and to ease the child’s self-consciousness. Additionally, if the basket has decorative accents, it will be ideal for a girl to wear to a celebration. However, the most important thing is to avoid overly tightening the baby’s curls to avoid future headaches and hair issues.
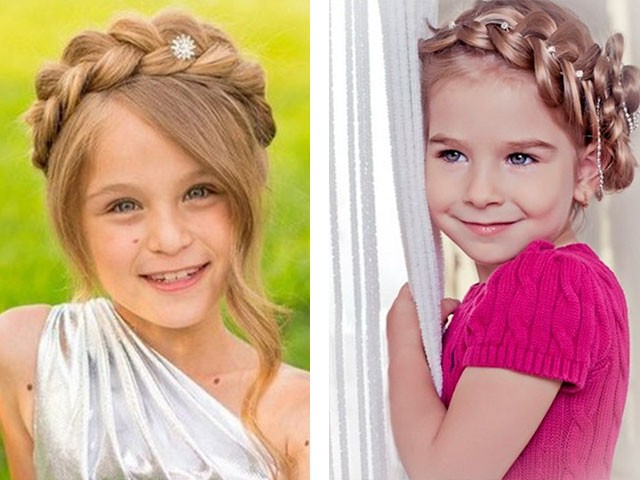
For older girls, you can incorporate a little looser weaving into the basket hairstyle as well as tight weaving; this will give the picture more volume and romance. This type of styling is frequently selected for wedding hair because it nicely embodies the idea of a delicate bride. Additionally, businesswomen can wear tight weaving as part of their regular wardrobe.
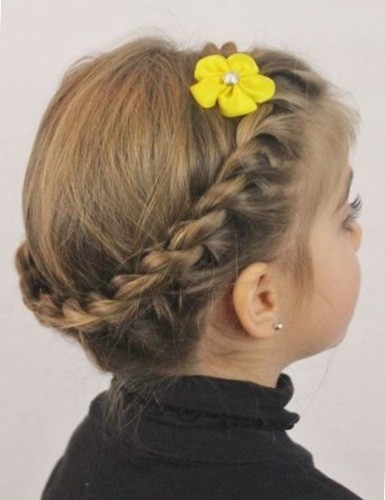

However, it is important to remember that girls with harsh facial features will not look good in a basket-shaped hairstyle. This kind of face will appear rough and draw attention to all of its imperfections.
Basket hairstyle for long hair – a classic version
You might have to try creating the basket hairstyle on long hair more than once before it becomes the perfect hairstyle, especially if you do it yourself.
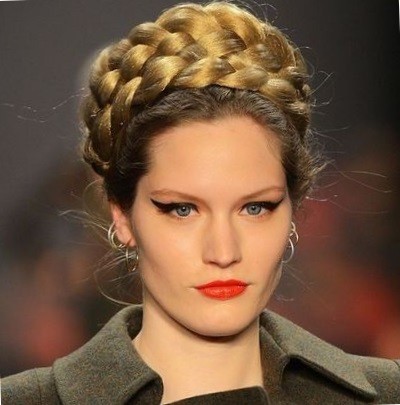
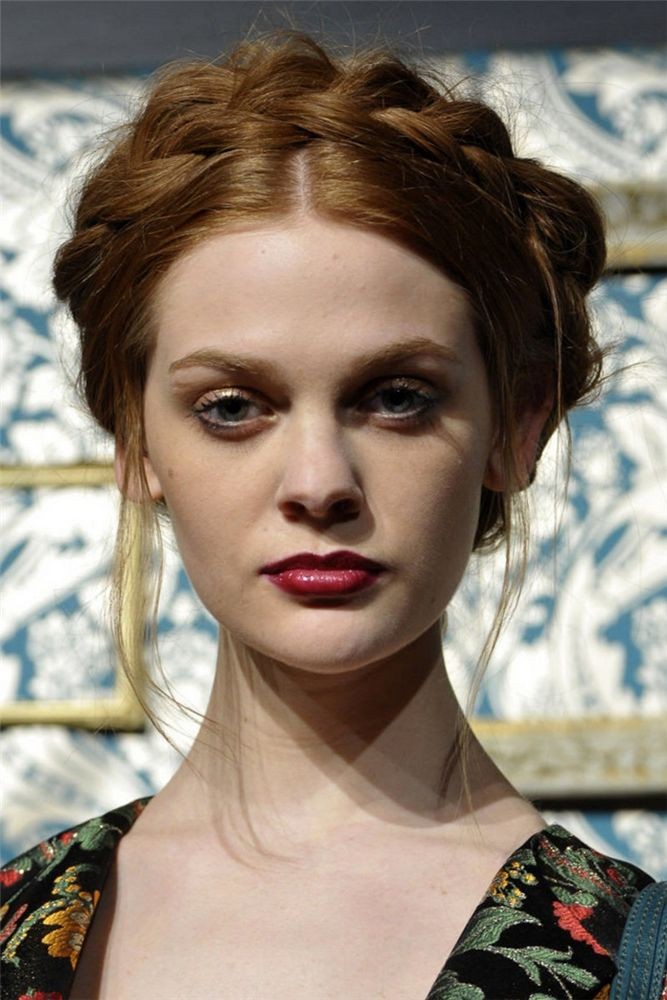
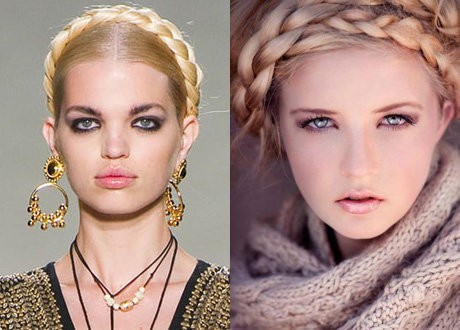
Let’s look at how to make a traditional version of this styling step-by-step.
A portion of the hair is divided at the crown, or top, and then rejoined in a circle. This area should contain precisely half of the hair. An elastic band needs to be used to secure these strands.
The actual weaving of the basket, which is best done in the ear region, comes next. A tiny strand from the entire mass must be crossed with a strand from the tail, and another strand from the entire head of hair must be added there.
You now have three strands, so you can begin weaving. The weaving’s curls must then be picked up and incorporated into the braid. Remember to continuously pick up the strands as you weave in a circle around the head.
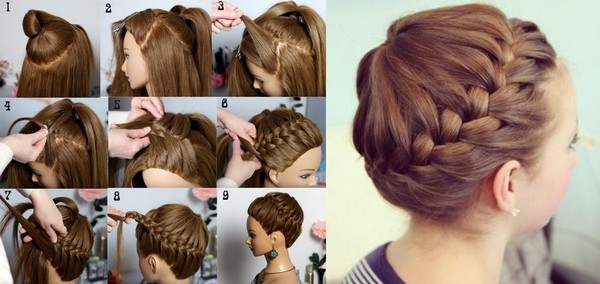
It is necessary to weave to the other side. If some hair did not fit into the braid, it can be tucked under the hairdo or used to make a flower. The strands can be stretched to add air to the image. You received a basket—a lovely and unique braid.
Basket with a braid
The process of weaving the basket starts the same as it did in the original version: parting the hair on the crown into circles and securing them. The strands in this instance ought to make up less than half of the entire mass.
There are two sections of hair close to the forehead. Additionally, the tail is split in half. Next, begin braiding the pigtail by taking two strands from the forehead area and one from the tail. Remember to pick up curls from the tail and from the entire mass as you proceed until you reach the middle of the back of the head.
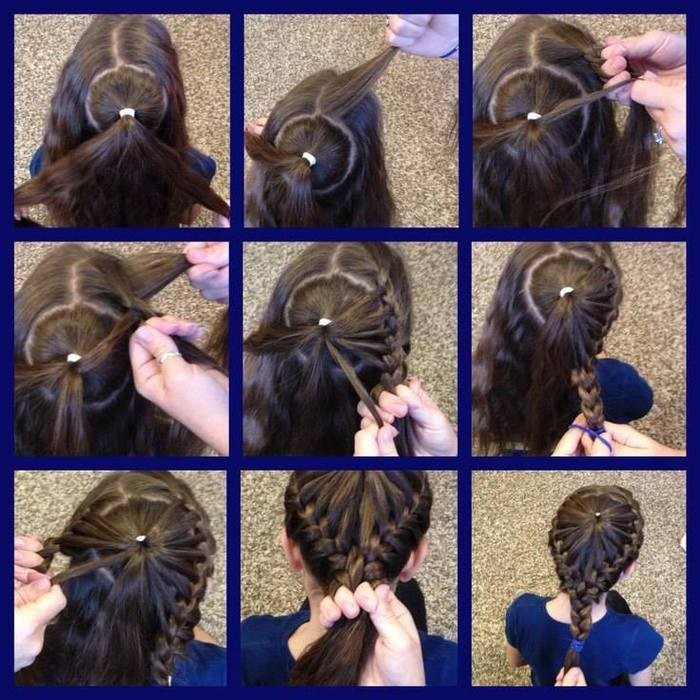
The same braiding must be done on the other side. Then, join the ends of the two braids at the back of the head, and carry on with the regular braiding until the length is reached. In this instance, a ribbon or lovely hair clip would go perfectly with this hairstyle.
Simplified version
For novices, this streamlined rendition of the basket hairstyle is ideal as a warm-up. It is not any less beautiful, even though it is easier to execute. Additionally, medium-length hair may work well with this option.

Simple braiding techniques are used here; special braiding knowledge is not needed. Two or three strands are braided into two standard braids, which are then wrapped around the head. One will descend, while the other will rise to the top.
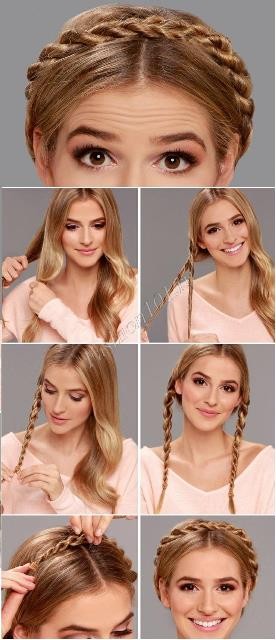
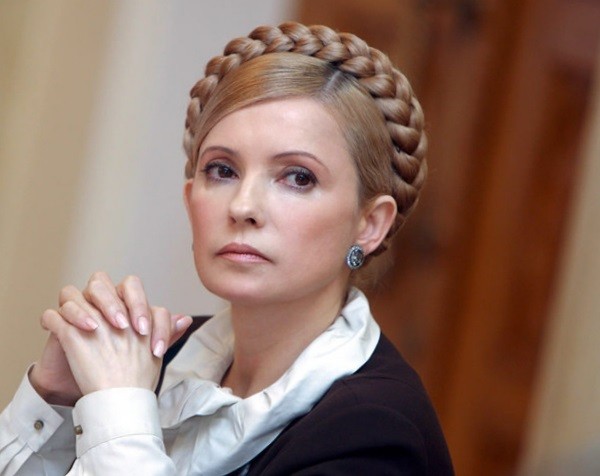
The parting is the main component of this hairstyle. Three-strand braiding results in a hairstyle akin to Yulia Tymoshenko’s.
Below is a step-by-step photo that shows you how to make it.

Basket hairstyle made of rubber bands
Not only can braiding create a basket hairstyle, but it can also be achieved with simple tiny rubber bands. This is a great option for kindergarten-age girls. You can accessorize it with colorful rubber bands for a unique look.
Initially, you must thoroughly brush your hair to ensure the girl is not in pain while the braids are being put on. A tiny ponytail is then tied close to the ear. After a while, another ponytail is made, and its ends are joined to the first one’s ends. Proceed in this manner around the head. If any hair remains, it should be covered up by the hairstyle.
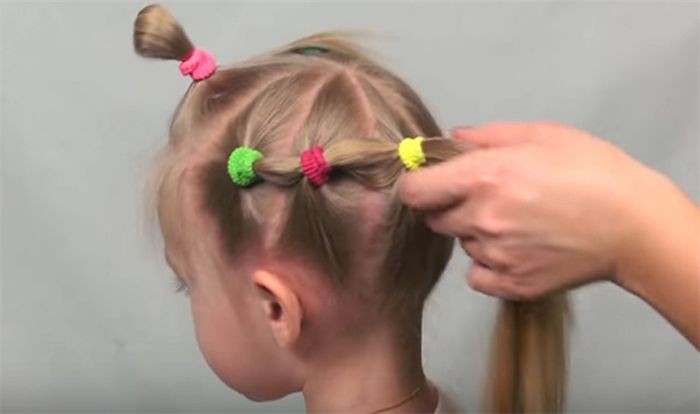
A lot of rubber bands and ponytails make the basket styling look prettier and more elegant.
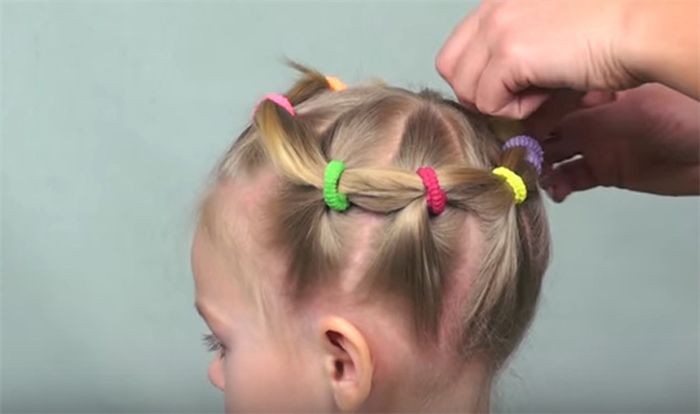
Watch the video content below to gain a better understanding of how to style with elastic bands.
Basket hairstyle for short hair
This styling, as previously stated, is universal. Even short hair can look good in the basket hairstyle. This is one possible way to style it.
There are two sections to the hair. Take a tiny curl from one side and wrap it into a tourniquet. The next step is to gather strands of loose hair, twist the tourniquet, and twist it with the curl that came before it.

Applying this to the back of the head is appropriate. Next, carry out the identical action on the other side. Next, tie the hair into a ponytail and conceal it beneath the hairdo.
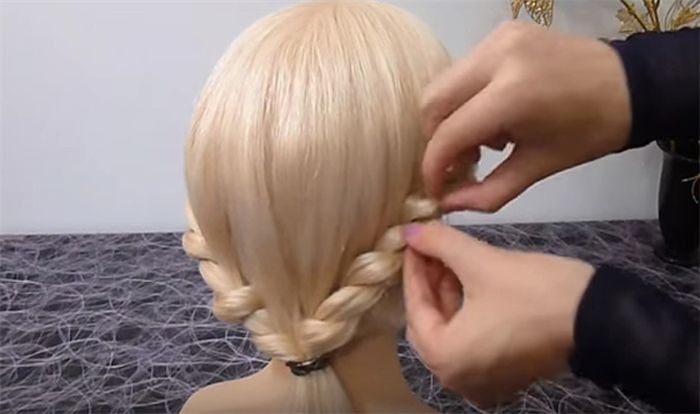
For ladies and girls, the basket hairstyle is a lovely and adaptable style that works well for special occasions as well as everyday wear. This detailed tutorial, which includes pictures, will walk you through the process of creating the intricate woven effect of the basket braid, which offers a special fusion of style and originality. This simple tutorial will help you create a gorgeous hairstyle that is sure to impress, whether you are doing it for someone else or for yourself.
French basket hairstyle
The French basket is unique in that it uses a French braid that is braided in the opposite direction, giving it a more voluminous appearance. This option for hairstyle is ideal for a wedding bride. This hairstyle can be made in many different ways.

This is one method for making a basket that works well for medium-length hair. After giving the hair a thorough brushing, a strand is taken from the crown and divided into a circle. On all sides of this circle, free strands ought to remain at the same time. You need to begin weaving a French braid with a tiny strand taken from one of the temples and a gradual selection of strands from the tail and the entire mass. Weaving this braid is simple; the key is choosing the curls from bottom to top rather than top to bottom.
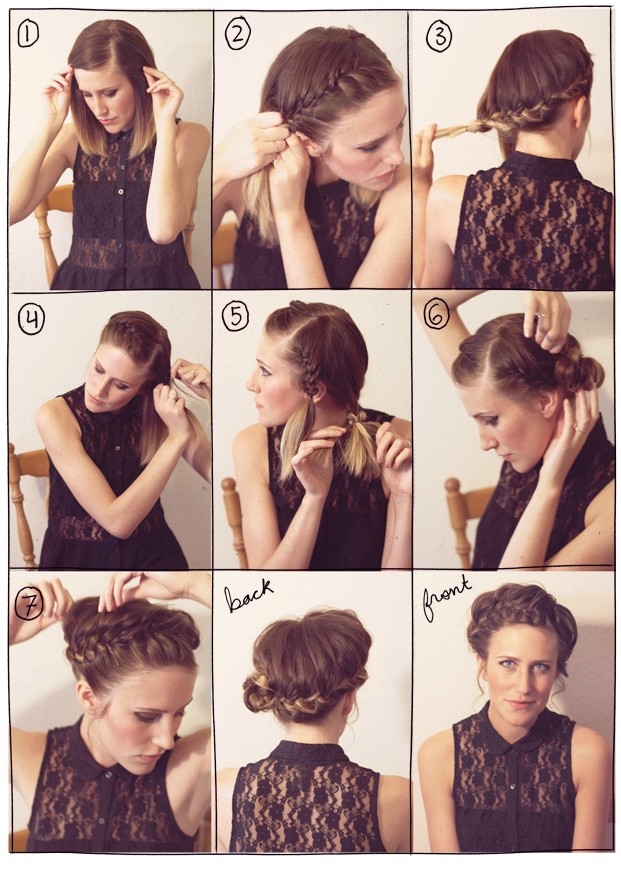
You must complete the braiding on one side before moving on to the other. The curls then meet at a point on the back of the head at the bottom. If you don’t have enough hair for a beautiful bun, you can use a special donut instead of curling them and leaving them in a tail. The braids are slightly stretched to create a more luxurious look. Finally, hairspray is used to fix the entire hairstyle.
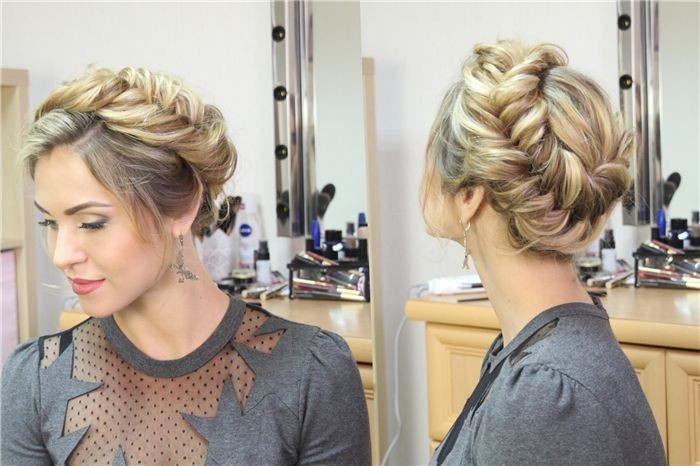
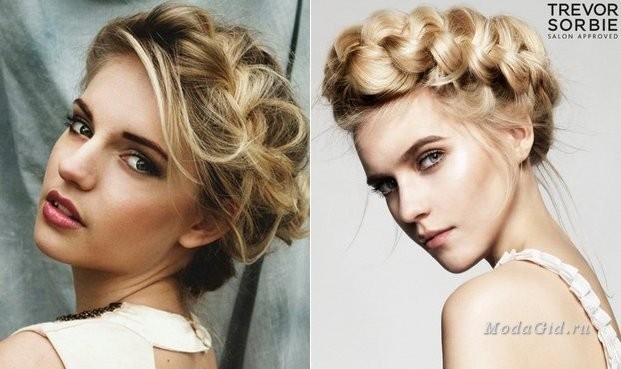
You can use any method you choose, such as weaving a "fish tail," braiding in advance, or creating a basket. Laying will still appear amazing.
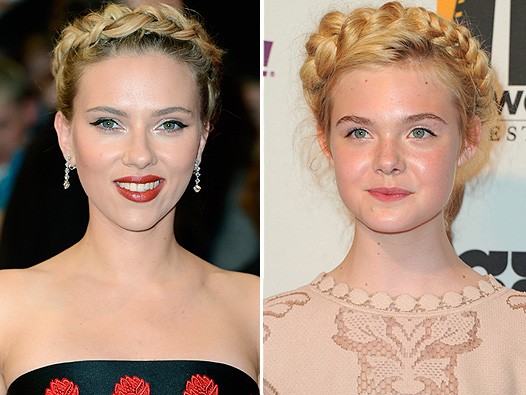


| Step | Description |
| 1 | Start by brushing the hair thoroughly to remove any tangles. |
| 2 | Divide the hair into two equal sections, parting down the middle. |
| 3 | Braid each section into a simple three-strand braid, securing the ends with elastics. |
| 4 | Wrap one braid around the back of the head, securing it with bobby pins as you go. |
| 5 | Repeat with the other braid, overlapping the first one to form a basket-like shape. |
| 6 | Adjust and tuck any loose strands, securing with more pins if needed. |
| 7 | Finish with hairspray to hold the style in place. |
The basket hairstyle is a sweet and adaptable option that suits ladies and girls alike. It adds a distinct flair and keeps hair neatly in place, making it suitable for both formal and everyday wear.
The basket style may appear complicated due to its complex braiding pattern, but it is actually very simple to create if you follow the step-by-step instructions. This hairstyle can be tailored to suit a variety of braiding skill levels, regardless of experience level.
You can add twists, change the thickness of the braid, or experiment with accessories to make the basket hairstyle uniquely your own. It’s a great way to dress up your appearance without sacrificing its sophistication or playfulness.


